¶ Entering Results for Booked-In Plates
¶ User Interface Overview
Results can be entered for Booked in Plates that have been incubated for the required amount of time through in Enter Results section of MRS.

¶ 1. Scan Barcodes
In the main Enter Results Section, click the Enter Result Set button below the Tabbed Navigation which will bring up the Scan Barcodes window.
Scan in both the Plate Stack and Sheet Barcodes.
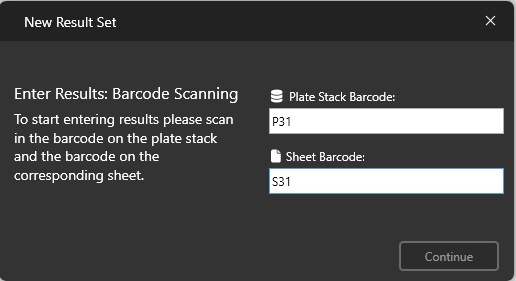
Once scanned, MRS will progress automatically to the next section.
Barcodes can also be typed in manually - the reference that should be typed is printed on the top-left of the relevant labels (highlighted below):
MRS will not automatically progress on to the next section when barcodes are typed manually.
Instead, press the Tab key when both barcodes have been entered to progress.

If the returned Instance is Sessional, at this point you will be prompted to enter which Session you would like to enter Results for.
¶ 2. Check The Book-In
At this point you a window should appear with the details of the relevant Book-In:
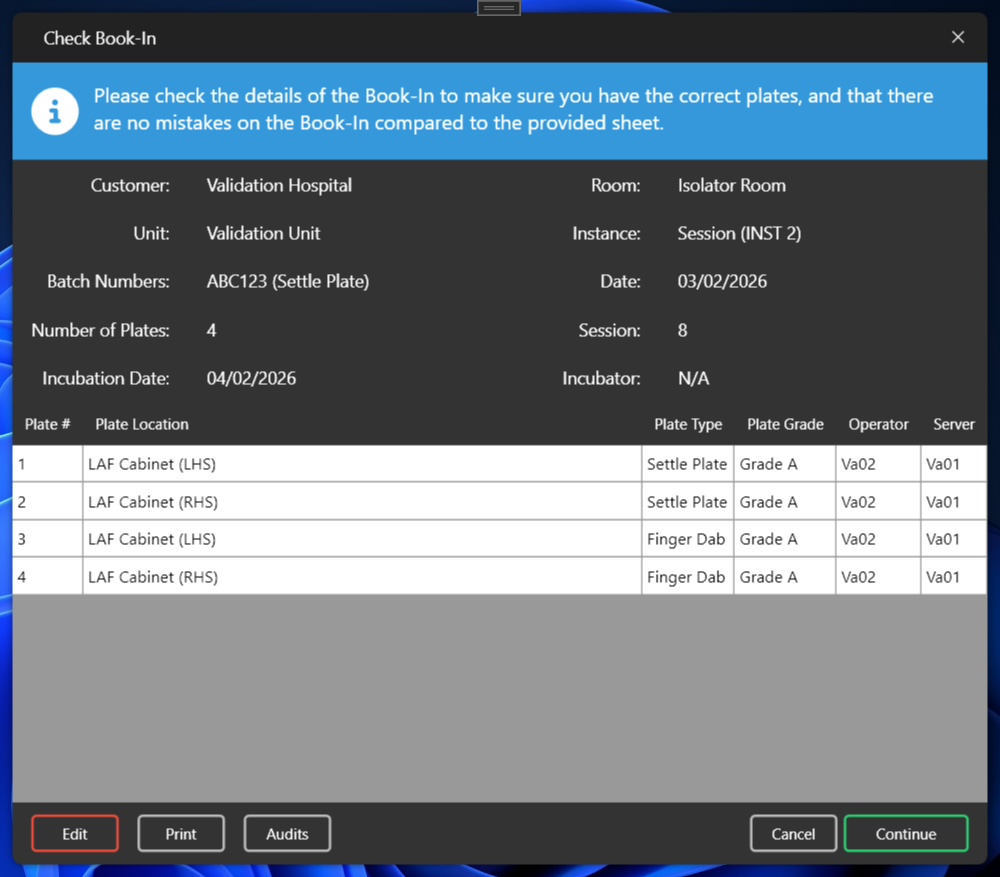
At this point you have the option to Edit the book-in, Print out the filled-in monitoring form, View any related Audits, or Continue to Enter Results.
If you have confirmed the Book-In details are correct. Click ‘Continue’ to progress to the ‘Enter Results’ stage.
¶ 3. Read the Plates
Double-click on the first plate that you would like to read and click OK.
Depending on your MRS configuration, you may be required to enter plates by entering the plate number each time, in which case a dialog will appear and ask you for the plate number to be read.
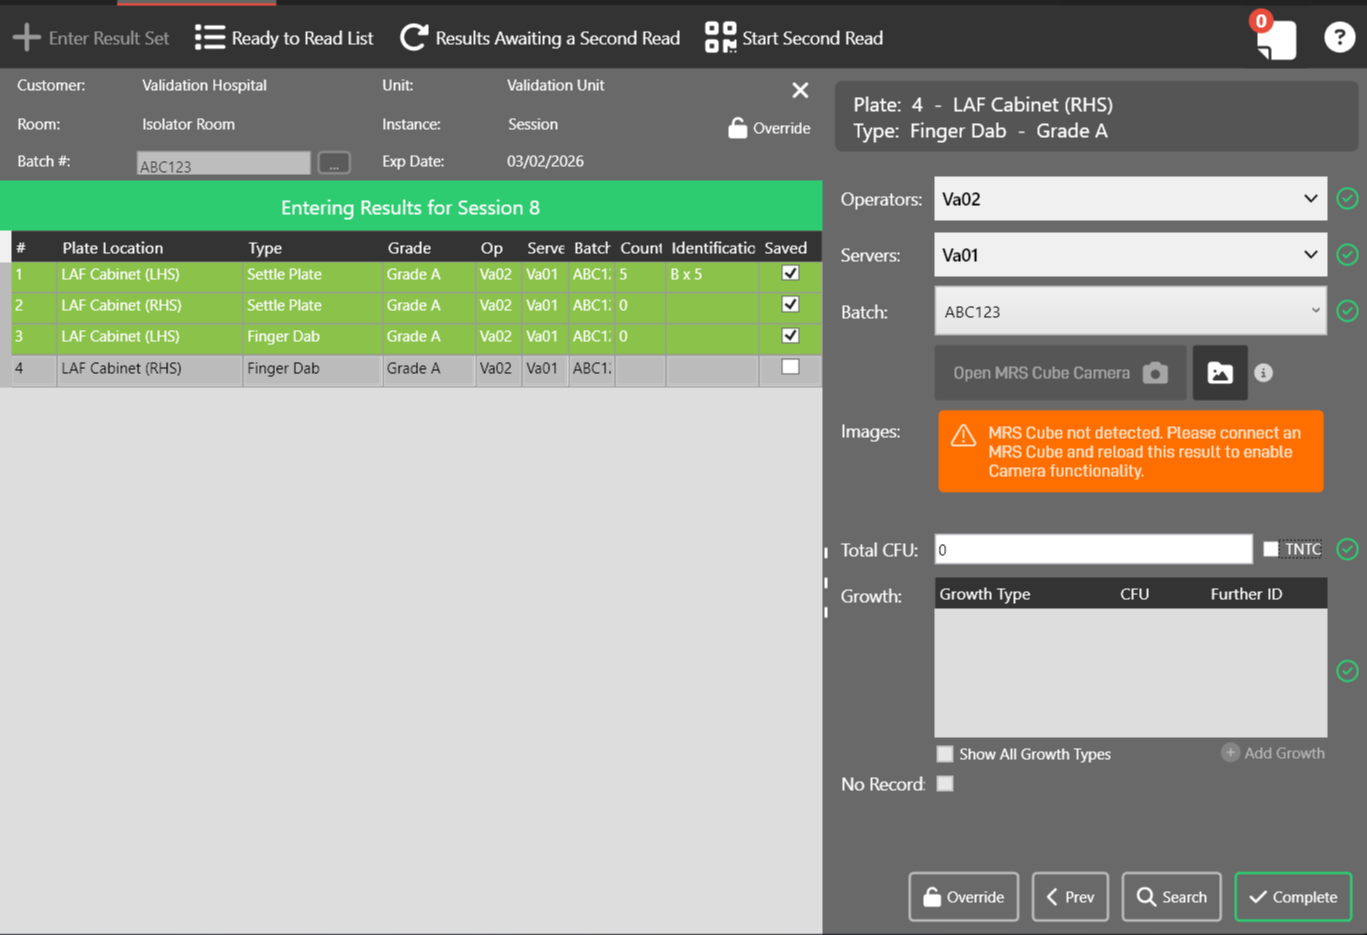
The right-hand pane should then activate, with a form in which you can fill out details.
From version 3.4.0 onwards there is an option to add an image to a plate using MRS Cube. First you need to ensure that plate capture is turned on for you by WJPS - please contact the helpdesk if you need this enabling.
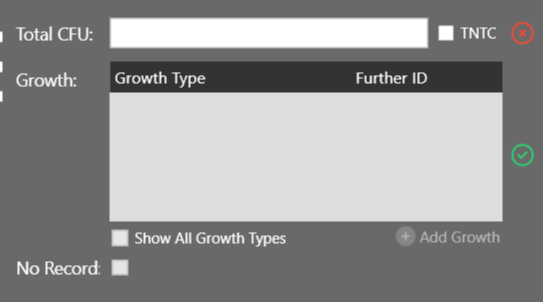
If the total CFU is not 0, then the ‘Add Growth’ button will activate, and Growth Type and Count details can be added:
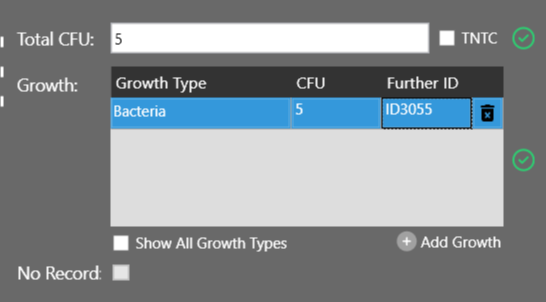
If the threshold for identification is reached, an Identification number will automatically be generated and displayed alongside the relevant growth.
If a plate has growths, but not enough to hit the threshold required to generate an Alert Report automatically, the option to Raise an Alert for the selected plate will appear:
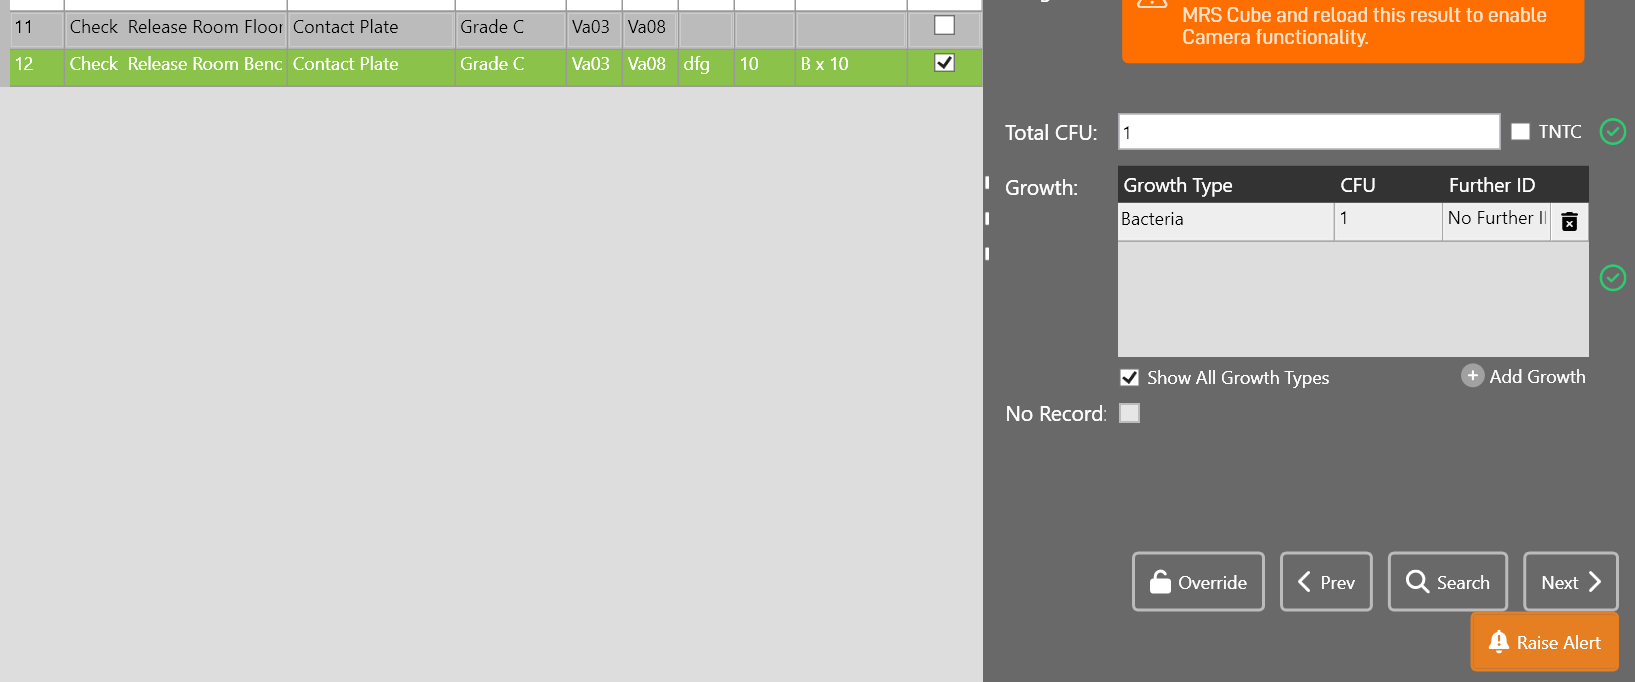
You will then be asked for an explanation as to why an Alert should be raised for this plate, and an Alert Report will then be generated for it.
Once the count of the entered growths matches that of the Total CFU, you can click ‘Next’ which will save the current result and progress on to the next in the result set, or ‘Prev’ which will do likewise but progress to the previous entry in the result set.
If the plate should be ‘No Record’, but this wasn’t specified at Book-In, the ‘No Record’ checkbox can be checked, but only after a Superuser has clicked the ‘Override’ button, which will unlock this control. Operators and Servers can also be changed when ‘Override’ is activated.
¶ Finalize the Results
Once results have been added against each plate, all the plate rows should turn green and a ‘Complete’ button should appear in the bottom right-hand corner of the screen.
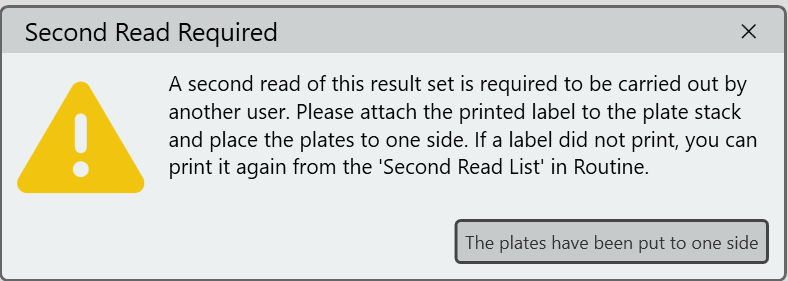
To finalize the result set, click ‘Complete’. If a second read is required, a dialog will appear at this time prompting you to set the plates aside.
The result set has now been completed and the initial barcode scanning dialog will appear again for the next result set to be entered.
¶ Second Read Results
Second read mode will enable the system to choose random results to be second read based on percentage criteria you set.
You can also choose for all results of a specific user to be second read for training purposes for example.
To enable second read mode please contact WJPS as this needs to be enabled specifically for your organisation. Please specify the percentage of results you wish to be second read.
When a Result Set has been read for the first time and ‘Complete’ has been clicked, MRS will determine if the Result Set requires a second read. If a second read is required, a dialog will appear notifying you as such, and recommends that the plates be set aside.
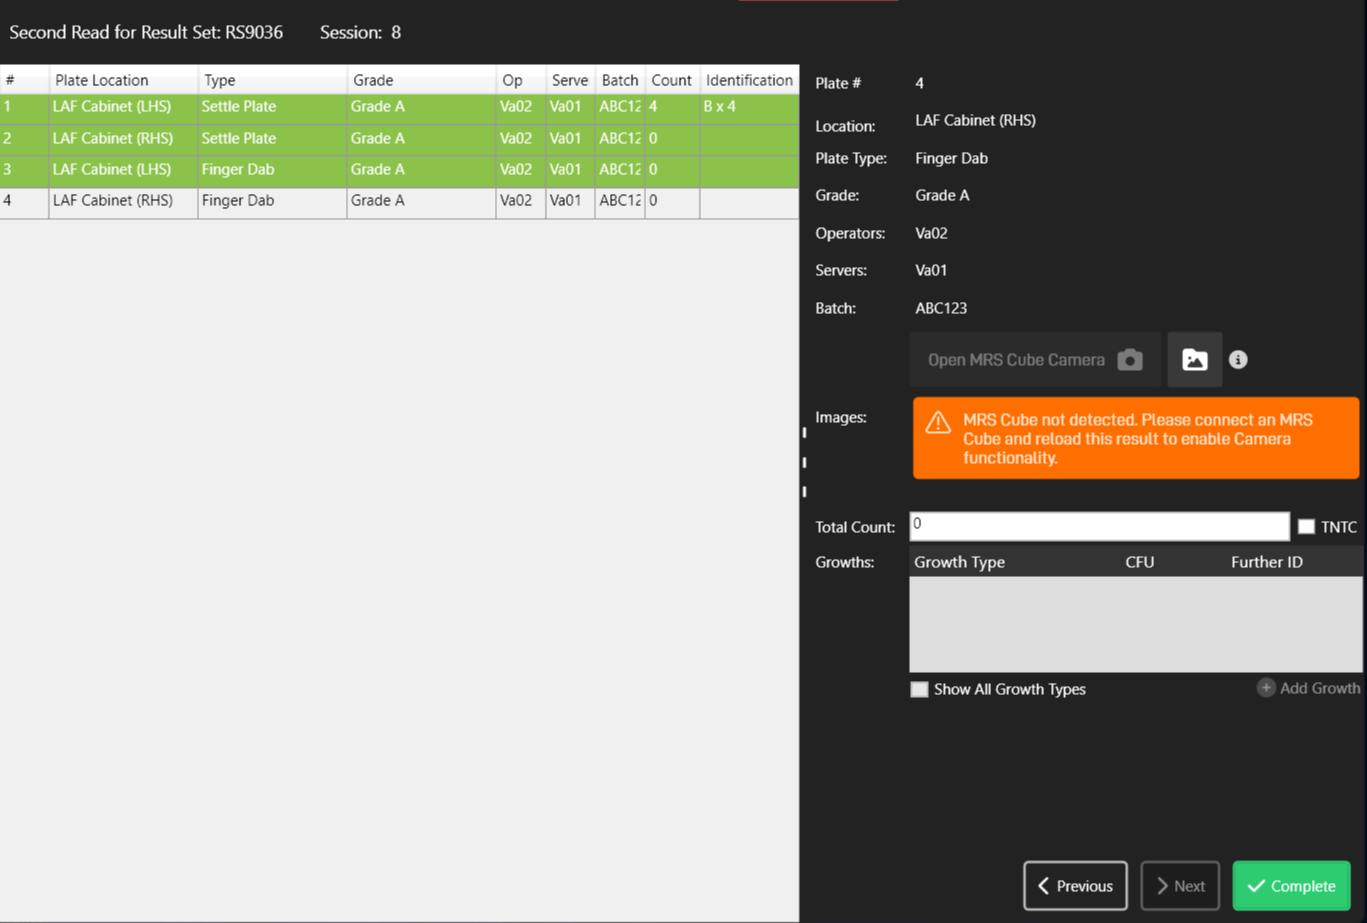
To start a Second Read, within Enter Results, click ‘Start Second Read’ and scan the barcode on the stack of plates to be re-read.
Note that the user performing the Second read must be different to the user that performed the first read.
If the same user attempts to second read the plates, an error will be shown and they will not be allowed to progress.
Results can then be entered in the same manner as the first read, but the Second Reader has no indication of what values were entered during the previous read.
Once submitted, both reads will be checked and if there is a discrepency, the user will be notified:
At this point, a User with Release-level permissions can view these conflicts within the Release Results section and choose the definitive read.